Saturday, December 29, 2012

DYI Earring Organizer

Follow Me on Pinterest
Hi everyone! This is my most recent project I made for my sister-in-law for Christmas. It cost me under $10 and looks rad. If I would have concentrated on this one project i could have finished it in a few hours but since I like to work on several projects, it took me a while..Hope you like :)

What you will need:
Frame you like ( this one was a clearance mirror from Hobby Lobby.)
Glue gun and glue sticks
Lace or what ever fabric you like
String of beads
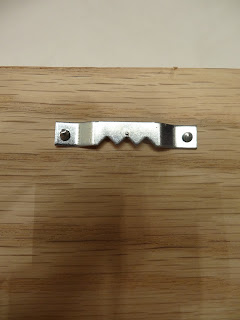
Picture hanger

DYI Earring Organizer 


 1. Decide the pattern you want for your lace.


 2. Cut to length and hot glue lace when its stretched tightly. If it is too loosthe weight of your earrings will make the lace sag.


 3. Hot glue your beads around the edge to make it look more complete.


 4. Fill in large gaps between lace with a different colored ribbon. The ribbon doesn't really serve any purpose but it looks cute!


5. Since most frames from Hobby Lobby are made from resin and not wood, you can't nail a picture hanger to the back. The force of the hammer will usually just crack parts of the frame off . Instead, I used pliers to bend the picture hanger in the shape of the frame. Then,I hot glued it on the inner edge with the teeth of the hanger bent down. That way the weight of the frame won't be on the glue but on the frame itself. Also, with the teeth folded down it will still hook on a nail without the worry of it falling off.


 I think this is a great gift because it is so easy to make and who doesn't love handmade presents. I know This girl does!

UPDATE: She Loves It!

Wednesday, December 5, 2012

How to make an anchor with String Art

Follow Me on Pinterest
Hi everyone! I got this idea from this blogger and thought it was so different and cool. I plan on giving this to my dad for Christmas since he is a sailor. The project took about 4 hours total but that was because I was watching Workaholics at the time and that show tends to distract me. Enjoy!


Anchor String Art


What You Will Need:
a board (Lowes sometimes gives out scrap pieces for free)
wire brads 18-gauge 5/8 in. (Lowes item #58174)
picture hangers (Lowes item #121140)
foam sponge sandpaper-fine
embroidery thread (Hobby Lobby has pretty much every color you can think of)
hammer
pliers
glue (I used Tacky Glue and it worked great)


Sand the edges of the board on each side until they are smooth. You can also sand the front as well but it shouldn't take much sanding.


Print out the shape you are wanting to use.


Cut the shape out and trace it onto the board in pencil so you can erase the lines when you are done. The anchor I used didn't have a loop so....I traced a Yahtzee cup lol 


Here comes the tedious part. Measure out the distance you want your nails and put dots where each nail should go. I used 1 in. between each nail. I marked the inches on a piece of thread so I could measure around curves easier. I also marked on my pliers how far I wanted the nails to go in so they all would be the same height.


Once the nails are in place you are ready for the embroidery thread. Tie a knot at around the first nail to keep the string in place and a knot at the end. If you keep tension on  the string it will look a lot neater than having the string sag. Once you are finished stringing, cut off all the loose ends from the knots and dab a little glue to hold the knot.


Add a picture hanger on the back and and you are done!

Thank you for reading and feel free to leave comments and questions!

UPDATE: He Loves It!